Winter weather and the Covid-19 lockdown has got many of us spending the bulk of our time at home. All this extra time spent at home offers the perfect opportunity to learn a new skill and what could be better than learning how to do your own gel manicure at home? If you’re a gel addict, investing in the right tools to do your own gel nails at home and perfecting the art of gel nail application, will help you save thousands of Rands on treatments in the long run. Here’s everything you need for an affordable DIY gel manicure at home.
Before you attempt an at-home gel manicure, you need to make sure you have the right supplies. Having the right equipment will mean the difference between a professional-looking result and an absolute mess. Here’s what you need:
A good-quality gel curing lamp

First things first, you will need a UV gel lamp. Buying the right gel lamp for your needs ultimately comes down to your budget, the brand of gel you’re going to use, cure time, and bulb life span. You get two types of lamps — LED and UV. LED lamps cure much quicker than UV. It typically takes 30 seconds to cure a layer of polish under LED and 90 seconds to cure a layer under UV. Essentially, LED manicures can take under 2 minutes of curing while UV manicures can take 5 or more minutes. If you’re impatient then an LED is the lamp for you.
LED lamps over a better bulb lifespan than UV lamps. LED lamps come with bulbs that are almost never replaced and last 50,000 hours. Bulbs in UV lamps can vary by manufacturer but generally last around 100 hours, before needing to be replaced. This may sound like a huge difference but, remember that each manicure only takes 5 minutes of curing. If you’re not a professional offering nail services and are only using your lamp to do your own nails at home once a week, then a UV bulb would last you about 23 years before needing to be changed. Whichever lamp you decide to invest in make sure it’s a reliable, high-quality brand.
Find the best prices on gel curing lamps online with PriceCheck:
A premium gel product

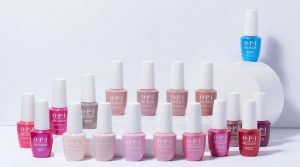
To get started you will need a good-quality gel polish to work with. Pay careful attention to buy the correct type of gel polish to complement your lamp. If you have a UV lamp, use a UV gel polish. Choose a highly pigmented polish, some have low pigment and require two or three coats. The more coats you apply the thicker your polish will look. A good gel polish should form a drop at the tip of the brush, if it does not it will not self-level and will be super difficult to apply.
Consistency is also important a thick gooey polish is not what you want. Find a brand that has colours you like and is constantly introducing new ones. Make sure you invest in a good gel top coat and base coat from the same brand as your chosen gel polish. The base coat you put on with your gel manicure is to make sure the gel polish will properly adhere to your nail. The top coat ensures that the product is sealed properly and won’t rub off with normal wear and tear.
Find the best prices on gel nail essentials online with PriceCheck:
Don’t forget the extras

To ensure you get a salon-quality end result, make sure you also invest in a good-quality cuticle oil, acetone nail polish remover, nail buff, nail clippers, and nail file. These tools are essential to prepping the nail before applying the gel. If you prep the nail properly before applying your gel, your manicure will stay salon-perfect for weeks to come.
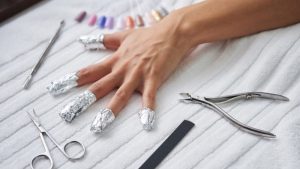
You will also need to ensure you have the right tools to remove the gel polish when you’re ready for a soak-off. Invest in a good-quality acetone-based gel soak-off product as well as a scraper to ensure you get all the gel polish and base coat off before applying a new set of gel nails.
Find the best prices on nail care essentials online with PriceCheck:


